Modular Standarization
This documentation is the refrence for creating modular in Mobile Team. The standardization was initiated to improve the quality of maintenance in the future. It can affect work efficiency both in terms of code and developers.
Architecture
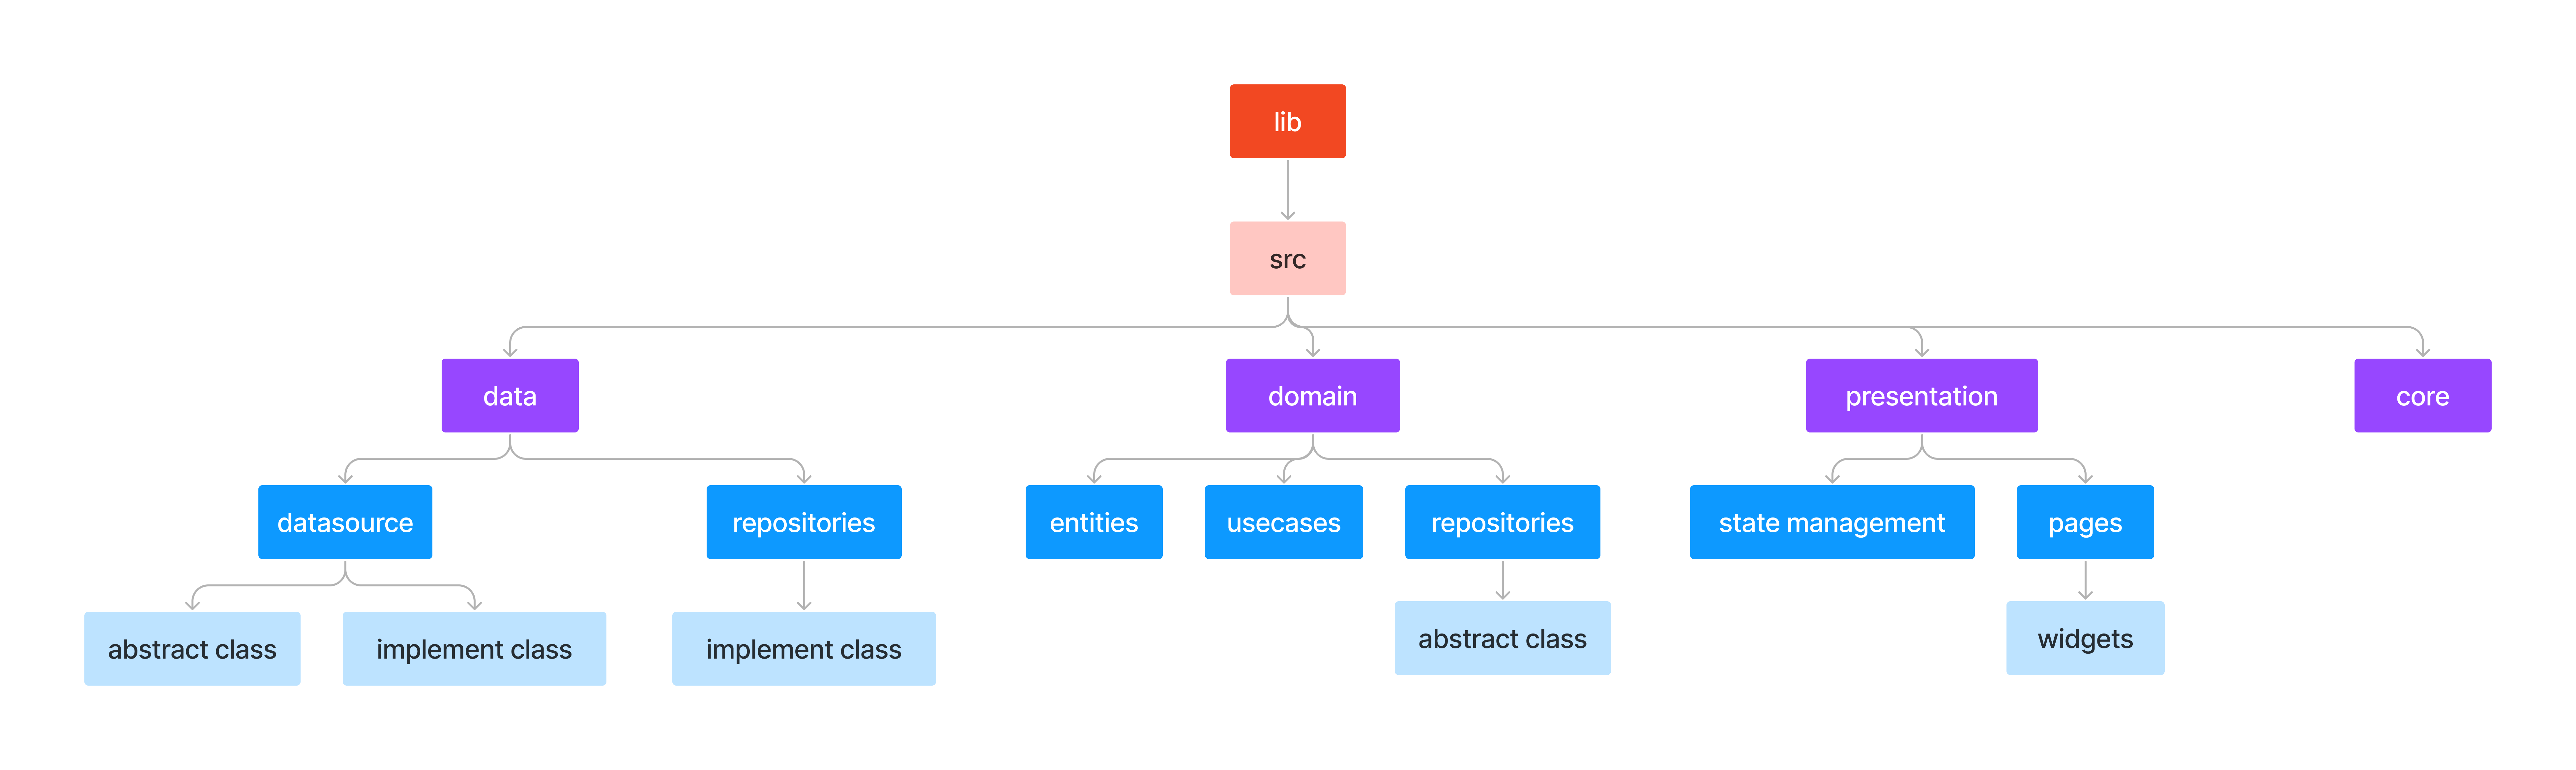
The Architecture or the folder structure in src has 4 main layers, if we break down the structure into a map it will look like the picture below:
Data Layer
Start from data layer, data layer is responsible for managing the storage and retrieval of data used by the application. It interacts with the infrastructure of the application, such as the database, external APIs, or any other data source. Inside the data layer, it has 2 layers which is datasources and repositories.
Datasources
In datasources There are 2 type of class files which are abstraction and concrete. Abstraction Class contains all the class contracts which can be performed on the class. Concrete Class contains the implementation of its abstraction class.
Abstract Class
abstract class CheckoutRemoteDataSource {
    ...
}
Rules:
-
Writing abstract class names in camelCase.
-
File Naming Rules:
Local: checkout_local_datasource.dart
Online: checkout_remote_datasource.dartnoteReplace the bolded text, as it should be.
Implement Class
class CheckoutRemoteDataSourceImpl implements CheckoutRemoteDataSource {
  late Dio dio;

  CheckoutRemoteDataSourceImpl({Dio? dio}){
    this.dio = dio ?? Dio();
  }

  @override
  Future<CourseEntity> getCourseDetail(int courseId) async {
    final response = await dio.get(
      "$apiCourseUrl/api/v1/course/$courseId",
      options: dioOptions(),
    );
    log("RESPONSE GET COURSE DETAIL : ${response.data}");
    int code = response.statusCode ?? 500;
    if (code == 200) {
      return CourseEntity.fromJson(response.data);
    }
    return ExceptionHandleResponseAPI.execute(
      code,
      response,
      'Error GET COURSE DETAIL ... failed connect to server',
    );
  }
}
Rules:
-
Line 1. Do not forget to implement the abstract class datasource.
-
Line 2-6. Initialize dio or any other http package in constructor.
-
Line 19-23. Return Exception handle or throw excetion if get the failed status code response.
-
If request required to use token, add the function below before execute main request.
await dioInterceptor(dio, token); -
File naming:
Local: checkout_local_datasource_impl.dart
Online: checkout_remote_datasource_impl.dartnoteReplace the bolded text, as it should be.
Repositories
Actual implementations of the repositories in the Domain layer. Repositories are responsible to coordinate data from the different Data Sources.
class CheckoutRepositoryImpl implements CheckoutRepository {
  final CheckoutRemoteDataSource _datasource;
  CheckoutRepositoryImpl(this._datasource);
  @override
  Future<Either<Failure, CourseEntiry>> getCourseDetail(int courseId) async {
    try {
      final response = await _datasource.getCourseDetail(courseId);
      return Right(response);
    } catch (e) {
      log("ERROR GET COURSE DETAIL : ${e.toString()}");
      return Left(ExceptionHandleResponse().execute(e))
    }
  }
}
Rules:
- Line 1. Do not forget to implement the abstract class datasource.
- LIne 2-3. Initialize datasource.
- Line 6-12. Use try catch for handling failed execution.
- Line 8. Return Right for success.
- Line 11. Return Left for failed.
Domain Layer
The Domain Layer is the most significant layer of the architecture since it contains the application's main business logic. This layer is responsible of expressing the concepts and entities of the business domain, and defines the application's rules and behavior. The separation of concerns ensures that the application's business logic remains separate from the user interface, data storage mechanism, and other external systems.
Entities
Contains models that are ready to use.
Repositories
Repositories in domain layer is the form of an abstract class in which there are functions that still need to be implemented.
Rules
- Writing abstract class names in camelCase.
abstract class CheckoutRepository {
  ...
}
Usecases
Actually this one is optional, but it can make things easier.
Presentation Layer
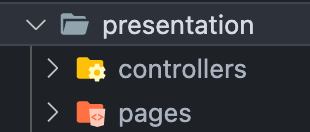
This layer is responsible for handling the user interface and user interaction with the application. This layer is the closest layer to the user and is responsible for presenting data and receiving input. if there will be a technology upgrade such as using bloc, only this layer must be changed (more efficient). This layer contains controllers which is the repository of state management and pages for the user interface.
Core
The core layer contains all the things that support all the layers. Although it is called "support" it is important, so its existence is mandatory. It contains 5 files that have different functions.
| File Name | Function |
|---|---|
| dio_interceptor.dart | To check the token is valid or not |
| dio_options.dart | For global option dio requests |
| exception_handler.dart | To handle errors during the data retrieval process via the API |
| exception.dart | Create custom message exceptions |
| failures.dart | This is a custom class for storing error values |
How to Create Modular
- Open Visual Studio Code.
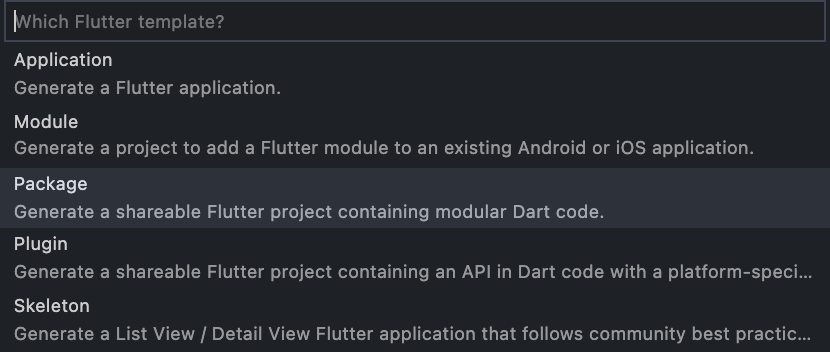
- Go to the menu bar and choose View >> Command Palette or simply by pressing Ctrl + Shift + P for Windows or Command + Shift + P for Mac.
- Select the Package option.
- Write the modular name.
Rules:ark_module_feature
ark_module_feature_prakerja
Versioning The Modular
Settings in the modular version, same as the main project.
name: ark_module_checkout
description: A new Flutter package project.
version: 0.0.1
homepage: none
How To Use The Modular
-
Export file to the main file.
export 'src/presentation/pages/ark_checkout_page.dart';
export 'src/presentation/controllers/ark_checkout_controller.dart'; -
Add to Pubspec.yaml
ark_module_checkout_prakerja:
  git:
      url: https://arkademi.tech:arkademi@gitlab.com/arkademi/module-checkout-prakerja-mobile.git
      ref: master